Most homes gain instant appeal and functionality when modern lighting is properly installed. You can transform dull spaces into bright, inviting areas by choosing energy-efficient fixtures, positioning lights strategically, and using layered lighting techniques. This guide walks you through each step to ensure your home shines with clarity and style.
Key Factors for Selecting Modern Fixtures
Style, scale, and placement shape how light interacts with your space. Consider these elements carefully to ensure harmony and function:
- Match fixture design to your room’s aesthetic
- Choose proportions that fit the ceiling height and room size
- Ensure proper placement for balanced illumination
- Verify compatibility with existing electrical systems
Though trends evolve, your choices should reflect how you live. Thou should prioritize long-term satisfaction over fleeting style.
Assessing Lumens and Color Temperature
Understanding brightness and light tone ensures comfort and usability. Use this guide to make informed choices:
| Measurement | What It Means for Your Space |
|---|---|
| Lumens | Indicates brightness; higher lumens = more light |
| Color Temperature (Kelvin) | Warm (2700K-3000K) for cozy areas, cool (4000K-5000K) for task zones |
Evaluating Room Function and Layout
Each room demands lighting tailored to its daily use and physical shape. A kitchen island needs focused task lighting, while a bedroom benefits from layered, softer sources. Ceiling height, window placement, and furniture arrangement all influence where and how fixtures should be installed. Thou must observe how you move through the space before deciding on layout and type.
Lighting should support the way you use each room, not fight against it. Open-plan areas often require multiple zones with adjustable brightness, while narrow hallways may only need wall sconces or recessed downlights. Consider traffic patterns and sightlines-overhead lighting that causes glare on a TV screen defeats its purpose. Position lights to enhance visibility, safety, and comfort without creating harsh contrasts or dark corners.
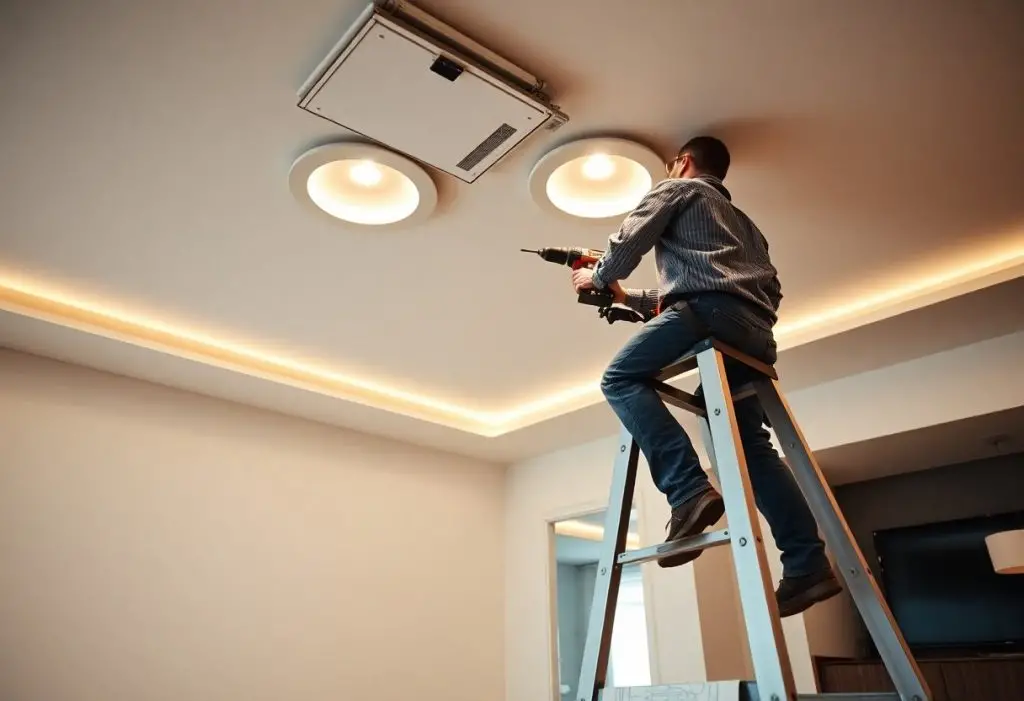
Essential Tools and Safety Protocols
Every successful lighting upgrade begins with the right preparation. You’ll need more than just a screwdriver to ensure clean, safe installations. Having the proper tools on hand streamlines the process and reduces the risk of mistakes. Always approach electrical work with caution and a clear plan.
Necessary Equipment for Electrical Installation
A voltage tester, wire strippers, pliers, and a drill with appropriate bits form the core of your toolkit. You’ll also need wire connectors, mounting hardware, and possibly a stud finder for ceiling fixtures. Having these items ready prevents delays and keeps your workflow smooth during the upgrade.
Critical Safety Measures and Power Management
Turn off the circuit at the breaker box before touching any wires. Use a voltage tester to confirm the power is off-never assume it’s safe. Wear insulated gloves and safety glasses, and keep your work area dry. Managing power correctly protects you and ensures a reliable installation.
Working with live circuits invites serious risk, so always verify the power is disconnected using a reliable voltage tester. Label the breaker to prevent accidental reactivation. If you’re unsure about your home’s wiring, consult a licensed electrician. Your safety is more important than finishing the job quickly-take the time to do it right.
How to Plan a Layered Lighting Design
You create depth and function in your space by combining different types of light. A well-layered design balances brightness, mood, and usability throughout the day. Think beyond a single ceiling fixture and consider how light moves and feels in each area.
Integrating Ambient, Task, and Accent Lighting
Your room needs a mix of light types to work well. Ambient lighting sets the base level of illumination, task lighting helps you see clearly while cooking or reading, and accent lighting highlights artwork or architectural details. Use fixtures like ceiling lights, under-cabinet strips, and recessed spots to achieve balance.
Mapping Electrical Points for Optimal Coverage
Placement determines how effective your lighting feels. Identify where you need light based on furniture layout and daily routines. Position outlets and switches so they align with key areas like kitchen counters, bedside tables, and entry paths for seamless control and full coverage.
Start by sketching your room’s layout and marking existing electrical outlets and switches. Note where you plan to place furniture, as this affects how you use light. Position new electrical points to support layered lighting-over countertops, beside beds, near reading chairs-ensuring each zone has access to the right type of illumination. Plan for dimmers and smart controls at key locations to enhance flexibility and comfort.
Step-by-Step Installation Guide
| Turn Off Power | Always switch off electricity at the breaker before starting any electrical work. |
| Remove Old Fixture | Unscrew and disconnect the existing fixture, noting wire positions. |
| Connect New Wires | Match black to black, white to white, and ground to ground using wire nuts. |
| Secure Fixture | Attach the new light to the mounting bracket and fasten all screws. |
| Test the Light | Restore power and switch on to confirm proper operation. |
Mounting Hardware and Wiring Connections
You’ll need a screwdriver, wire stripper, and voltage tester to get started. Attach the mounting bracket to the electrical box using the provided screws. Connect the fixture’s wires to the house wires by twisting matching colors together and securing them with wire nuts. Tuck the wires neatly into the box before fastening the fixture in place.
Installing Dimmers and Smart Controls
Your lighting experience improves when you install dimmers or smart switches. Turn off the power, remove the existing switch, and disconnect the wires. Connect the new dimmer or smart control following the manufacturer’s instructions, usually involving matching colored wires and grounding.
Smart controls let you adjust brightness, color, and scheduling from your phone or voice assistant. Choose models compatible with your home’s Wi-Fi and lighting type. Some require a neutral wire, so verify your electrical box has one before purchase. Once installed, download the app and follow setup prompts to integrate the system into your daily routine.
Tips for Maximizing Visual Brightness
- Paint walls in light, neutral tones to amplify natural and artificial light.
- Use mirrors opposite windows to reflect daylight deeper into the room.
- Keep window treatments minimal or sheer to allow maximum sunlight.
- Arrange furniture to avoid blocking light sources or windows.
- Choose glossy or semi-gloss finishes on surfaces to enhance light diffusion.
After positioning your lighting and décor with reflection in mind, the space feels noticeably more open and inviting.
Utilizing Reflective Surfaces and Placement
Strategic placement of mirrors and glossy finishes helps bounce light across the room. Position a large mirror behind a light fixture or facing a window to extend the reach of illumination. Even furniture with polished surfaces can contribute to a brighter atmosphere when placed thoughtfully.
Selecting High-Efficiency LED Solutions
LED bulbs use up to 75% less energy and last far longer than traditional options. Choose bulbs with a color temperature between 2700K and 3500K for warm, inviting light. Look for high lumens per watt to ensure strong output without excess energy use.
Modern LED technology offers dimmable and color-tunable options that let you adjust the mood and function of any room. These bulbs generate little heat, making them safer and more efficient over time. With the right color rendering index (CRI) above 80, colors in your space appear more true and vibrant under LED illumination.
Troubleshooting Common Installation Issues
Even with careful planning, minor setbacks can occur during lighting installation. You might face unexpected wiring complications or compatibility issues with dimmer switches. Stay calm and methodically verify each connection against the manufacturer’s instructions. Most problems have straightforward fixes when approached with patience and attention to detail.
Resolving Circuit Overloads and Flickering
You may notice lights flicker or trip the breaker when adding modern fixtures. This often happens when too many devices share one circuit. Check your home’s electrical load and consider redistributing fixtures across different circuits. Replace old dimmers with compatible models designed for LED or smart bulbs to stop flickering.
Ensuring Proper Fixture Alignment and Stability
Your fixture should sit flush and level against the ceiling or wall. If it wobbles or tilts, double-check that the mounting bracket is securely fastened and the electrical box is rated for the fixture’s weight. Use a level during installation to ensure clean, professional positioning every time.
Proper alignment isn’t just about appearance-it affects safety and performance. A loose or uneven fixture can strain wiring connections over time, creating a hazard. Make sure the junction box is firmly anchored in place, especially with heavier designs like chandeliers or linear pendants. Tighten all screws evenly and test stability before restoring power.
Final Words
With these considerations, you can confidently install modern lighting to enhance your home’s brightness and ambiance. Choose energy-efficient fixtures, plan placements based on room function, and balance ambient, task, and accent lighting. Your attention to detail ensures a well-lit, inviting interior that reflects both style and practicality.