Just as your home depends on reliable heating and cooling, a professional HVAC installation ensures long-term comfort and efficiency. You’ll experience a thorough assessment, precise equipment setup, and expert handling of ductwork, electrical, and safety components-all performed with minimal disruption to your daily routine.
The Preparation of the Ground
Proper groundwork ensures a smooth HVAC installation. You’ll need to create a clean, accessible environment where technicians can work efficiently and safely. This phase sets the standard for precision and care throughout the entire process.
Clearing the Work Zone
Start by removing furniture, stored items, and obstacles near the installation area. This gives technicians unobstructed access and reduces the risk of damage to your belongings. A clear space also speeds up the overall timeline.
Laying the Protective Tarps
Technicians will spread heavy-duty tarps across floors and nearby surfaces. These shields guard against dirt, debris, and accidental scratches during equipment handling. You’ll appreciate the care taken to preserve your home’s condition.
Your installer uses reinforced, non-slip tarps that cover entry paths and high-traffic zones. These are secured at the edges to prevent tripping and shifting. Protection extends beyond flooring-it often includes doorframes and walls where equipment is maneuvered, ensuring your home remains as pristine as the day work began.
The Removal of the Old Machine
Removing your outdated HVAC unit begins with powering down the system to ensure safety. Your technician will carefully disconnect electrical wiring, refrigerant lines, and duct connections. This step clears the way for your new system and prevents damage to your home’s infrastructure during extraction.
Draining the Lines
Draining the refrigerant lines must be done properly to avoid environmental harm. A licensed technician recovers the refrigerant using specialized equipment, following EPA regulations. You’ll want this handled correctly-it keeps your home compliant and prepares the system for safe disassembly.
Hauling Away the Iron
Once disconnected, the old unit is carefully removed from its location. Heavy metal components are transported out of your home with protective measures to prevent floor or wall damage. Your technician ensures a clean, efficient removal process from start to finish.
Disposing of the old HVAC system involves more than just dragging it outside. Many components contain recyclable metals, and responsible contractors will transport them to certified recycling facilities. This not only reduces landfill waste but also supports sustainable practices. You’re not just upgrading comfort-you’re contributing to a cleaner cycle in home improvement.

Setting the New Unit
Proper placement ensures your HVAC system operates efficiently for years. Your technician will position the new unit on a stable, level surface, aligning it with existing ductwork and electrical connections. This step sets the foundation for optimal airflow and system performance, minimizing wear and reducing future service needs.
Leveling the Base
A stable foundation starts with a perfectly level base. Your installer will use precision tools to adjust the concrete slab or mounting pad, ensuring no tilt or shift. An unlevel surface can lead to vibration, uneven wear, and premature failure-so this small step makes a big difference in long-term reliability.
Fitting the Air Handler
The air handler must align precisely with duct openings and refrigerant lines. Your technician secures it in place, checks for secure mounting, and verifies clear access for filters and service points. Proper fit prevents air leaks and maintains the efficiency of your entire system.
Positioning the air handler correctly affects both airflow and indoor comfort. It’s typically installed indoors-often in a basement, attic, or closet-and connected directly to the duct network. The unit circulates conditioned air throughout your home, so its alignment with supply and return ducts is necessary. Installers use supports and vibration isolators to reduce noise and stress on connections. Electrical wiring and condensate drains are also linked at this stage, following local codes and manufacturer specifications to ensure safe, reliable operation. A misaligned or poorly secured air handler can lead to inconsistent temperatures, higher energy bills, and frequent repairs.
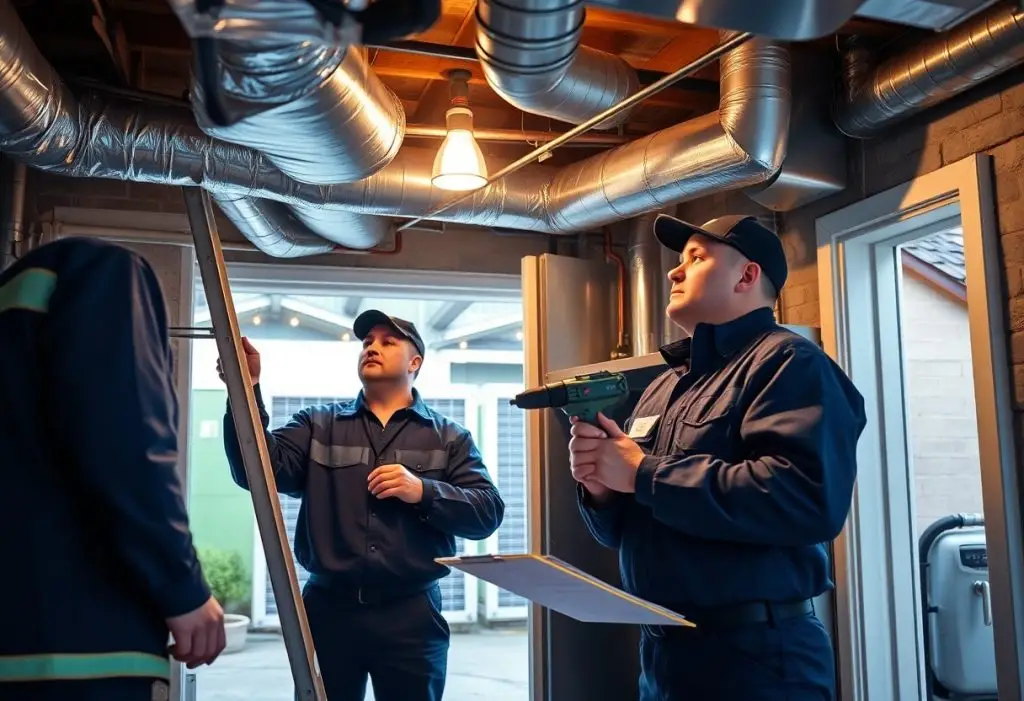
The Hard Work of Connection
Installing your new HVAC system involves precise, hands-on tasks that ensure everything runs smoothly. You’ll see technicians moving quickly but carefully, connecting components that link refrigerant lines, electrical systems, and ductwork. This stage transforms the setup from separate parts into a functioning whole, requiring skill and attention to every detail.
Soldering the Copper
Soldering the copper lines demands steady hands and experience. You’ll notice the technician heating the joints just enough to melt the solder, creating airtight seals that prevent refrigerant leaks. Each connection must be smooth and uniform, ensuring long-term performance and system efficiency.
Wiring the Circuitry
Wiring the circuitry ties the system’s electrical components together with precision. You’ll see labeled wires connected to the thermostat, air handler, and outdoor unit, following the manufacturer’s schematics. Correct connections ensure safe, reliable operation and prevent short circuits or malfunctions.
Every wire you see being connected serves a specific purpose in controlling temperature, fan speed, and system safety. Technicians double-check each terminal to match the wiring diagram exactly, securing connections tightly to avoid loosening over time. Proper wiring not only enables communication between indoor and outdoor units but also supports efficient energy use and responsive performance when you adjust your thermostat.
The Pressure Test
Every professional HVAC installation includes a pressure test to verify the integrity of the refrigerant lines. Your technician will charge the system with nitrogen to a specific PSI, monitoring it over time. This controlled test reveals weaknesses or flaws in joints and connections before refrigerant is ever introduced.
Pulling the Vacuum
After passing the pressure test, your system undergoes vacuuming to remove moisture and air. A vacuum pump pulls the pressure down to a deep vacuum level, typically below 500 microns. This step ensures the internal environment is clean and dry, preventing performance issues and compressor damage.
Checking for Leaks
Once the vacuum holds steady, your technician checks for any signs of leaks. Even the smallest breach can compromise efficiency and refrigerant levels over time. This inspection confirms the system remains airtight under stress, a key factor in long-term reliability.
Leak detection often involves using electronic sniffers or applying bubble solution at joints and valves. You’ll see your technician methodically inspect each connection, watching for any reaction. Catching leaks now avoids costly repairs later and ensures your system operates at peak efficiency from day one.
The Final Walkthrough
Your technician will guide you through the completed HVAC installation, ensuring every component operates as designed. You’ll see how the system starts up, cycles, and maintains temperature, giving you confidence in its performance. This step confirms everything meets manufacturer and safety standards.
Measuring the Airflow
A technician uses specialized tools to check airflow at vents throughout your home. Proper airflow ensures even temperatures and system efficiency. You’ll learn how balanced distribution prevents strain on the unit and improves comfort in every room.
Explaining the New Controls
Your installer walks you through the thermostat and system settings, showing how to adjust modes, set schedules, and use features like fan circulation. Understanding these controls helps you manage comfort and efficiency with ease from day one.
Mastering your new thermostat begins with simple, clear guidance from your technician. They’ll demonstrate how to program daily temperature changes, activate energy-saving modes, and interpret system alerts. Knowing how to respond to messages on the display keeps your HVAC running smoothly and reduces unnecessary service calls. This hands-on review turns technical features into practical tools you can use every day.
Conclusion
Conclusively, you can expect a professional HVAC installation to involve a thorough assessment of your space, precise system sizing, and careful handling of ductwork, electrical connections, and refrigerant lines. You receive clear communication, minimal disruption, and a fully tested system ensuring comfort, efficiency, and long-term performance in your home.