Just focus on practical upgrades you can complete confidently: plan scope, set a smart budget, and fix safety hazards first. You should choose finishes and lighting that boost curb appeal while preserving resale value and efficient function.
Key Takeaways:
- Start with a clear budget and a prioritized checklist of the eight steps to guide decisions.
- Choose paint, lighting, and new hardware to deliver the biggest style gains for the least cost.
- Optimize layout, storage, and traffic flow to improve daily function and comfort.
- Combine timeless materials with a few current finishes to keep the look fresh without frequent overhauls.
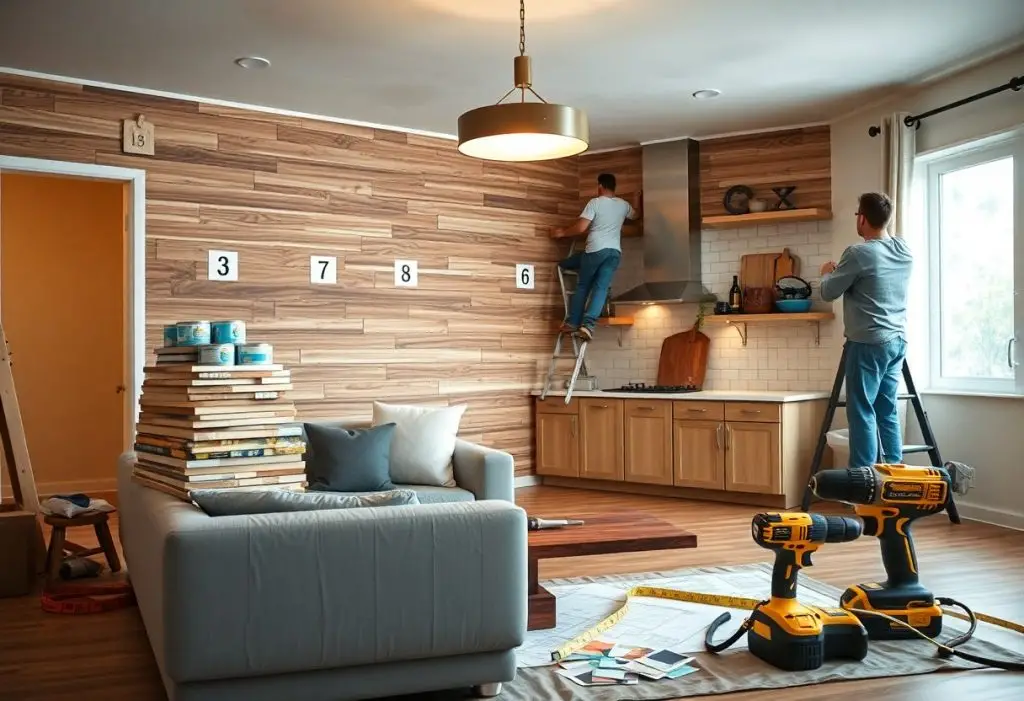
- Hire licensed contractors for electrical, plumbing, and structural work, and secure permits before starting.
Strategic Planning and Financial Budgeting
Planning sets a clear roadmap so you align design choices with costs; allocate a contingency of 10-15% and list priorities to avoid overspend and last-minute compromises.
Defining a cohesive aesthetic vision
Style anchors your choices-pick a color palette, select finishes you love, build a mood board, and choose a few signature pieces to keep rooms cohesive and intentional.
Establishing a realistic renovation budget
Budgeting makes you list must-haves, collect contractor quotes, and account for permits; assign room limits and include a 10-20% contingency to cover unexpected costs.
Track expenses weekly so you catch overruns early; request detailed bids, compare labor versus material costs, and set aside a contingency of at least 10-20% for unexpected structural issues or change orders. Protect yourself by confirming permits, using written contracts, and avoiding full payments before milestones are complete.
Mastering the Art of Layered Lighting
Balance ambient, task, and accent layers so you can set mood and function; use dimmers and directional fixtures to avoid glare while highlighting focal areas for comfortable, flexible living.
Integrating ambient, task, and accent sources
Mix ambient warmth with focused task lights and subtle accents so you can tailor illumination per activity, adding dimmers and layered switches to control intensity and mood.
Utilizing statement fixtures as focal points
Make a chandelier or sculptural light the room’s anchor so you can draw eyes and define style; ensure scale matches ceiling height and furniture layout.
Consider fixture scale relative to ceiling height and room size so you can avoid overpowering the space; check that pendants over tables leave at least 30 inches of clearance to prevent glare and collisions. If a fixture is heavy or needs new wiring, hire a pro to secure mounts and meet electrical codes, and choose warm bulbs with dimmers for versatile ambience.

Curating a Sophisticated Color Narrative
Choose a restrained base that ties rooms together and lets finishes breathe; pick a timeless neutral base you can layer on, and avoid abrupt shifts that fragment sightlines. You should test tones in both daylight and evening light to ensure consistency.
Selecting timeless palettes for longevity
Anchor your scheme to two primary hues and a neutral foundation, so rooms age gracefully; you can refresh accents without repainting. You should sample paint on large boards and view them across a full day to confirm tonal harmony.
Using accent tones and textures for depth
Introduce bold accents sparingly to create focal points, and combine with tactile finishes; watch for over-saturated accents that can overwhelm a calm scheme. You should balance color pops with soft fabrics and matte surfaces for measured contrast.
Experiment with the 60/30/10 rule to allocate base, secondary, and accent colors; place accents in clusters to guide sightlines. You should test textures-velvet, woven linen, wood grain, brushed metal-to observe how light and scale alter perception, and avoid too many competing accents that fragment the room’s flow while using repetition to unify.
Optimizing Spatial Flow and Furniture Selection
Plan your layout to prioritize movement and sightlines; keep 30-36 inch pathways between key furniture, arrange seating to encourage conversation, and choose scaled pieces so rooms feel open rather than overcrowded.
Prioritizing ergonomics and room proportion
Assess how you use each room and select furniture heights and depths that match your daily habits; ensure seat heights and table clearances support comfort and avoid cramped arrangements that strain movement.
Investing in high-quality foundational pieces
Choose staple items with durable frames and quality upholstery so they withstand daily wear; you’ll save by avoiding frequent replacements and maintain a polished base for styling seasonal accessories.
Look for solid joinery, kiln-dried hardwood frames, and replaceable cushions; test seat firmness in person and inspect stitching. Favor brands that offer long warranties and avoid low-cost particleboard or glued assemblies that can fail quickly. Investing in these pieces gives your room a lasting backbone and reduces long-term expense.
Enhancing Comfort with Textiles and Soft Goods
Textiles and soft goods soften rooms, add comfort, and reduce noise; you should mix textures and patterns to achieve a layered, lived-in feel without clutter.
Layering fabrics to create visual warmth
Mix lightweight linens with chunky knits and velvet accents so you can create depth; use color and scale to keep the visual warmth balanced and intentional.
Selecting rugs and window treatments for cohesion
Choose rugs and window treatments that share a palette or complementary patterns so you create cohesive rooms; anchor rugs with non-slip pads to boost safety.
Match rug scale to room size, leaving floor borders; choose pile height for traffic and pick window liners or blackout for bedrooms to improve sleep. Test samples under light and secure with proper hardware for safety and longevity.
Refining Details and Functional Hardware
Focus on hardware and small finishes to sharpen your design: swap worn handles, add soft-close hinges and smart locks, and pick finishes that tie into your palette for a cohesive, practical result.
Updating fixtures for a modern aesthetic
Choose streamlined faucets, matte finishes, and integrated lighting to give your rooms a clean, current appearance while improving function.
Incorporating curated art and greenery
Introduce curated art and plants to add personality and soften hard surfaces; you can use varying heights and low-maintenance greenery for lasting style.
Balance scale, color, and texture when arranging art and plants; you should rotate pieces seasonally, group smaller works for visual weight, and pick pots that echo your palette. Protect artwork by placing plants where you can easily water them and by keeping humidity-sensitive pieces away from wet zones-avoid overwatering and keep art at a safe distance.
Final Words
The eight practical steps give you a clear plan to refresh your home’s style, manage budget and function, and help you make confident design choices that boost comfort and curb appeal.
FAQ
Q: What are the 8 practical steps for a stylish home improvement makeover?
A: Step 1: Assess each room to list needs, wants, and non-negotiables so you know where to focus time and money. Step 2: Define a clear style direction by collecting images, noting recurring colors and finishes, and picking one dominant theme to avoid a fragmented look. Step 3: Set a realistic budget that allocates funds to high-impact elements like paint, lighting, and flooring while leaving a contingency of 10-20% for surprises. Step 4: Prioritize projects that change the room’s feel quickly, such as new lighting, hardware, or paint, to get visible results early. Step 5: Create a phased timeline that schedules disruptive work (plumbing, electrical) first, then finishes (trim, paint, décor) so rooms become usable sooner. Step 6: Choose durable, stylish materials that match daily use patterns-easy-clean fabrics, scratch-resistant flooring, and finish choices that hide wear. Step 7: Mix DIY tasks you can complete well (painting, simple installs) with professional work for structural, electrical, or complex plumbing to control costs and quality. Step 8: Finish with cohesive details: coordinated hardware, layered lighting, and a few statement pieces to pull the room together and keep the overall look intentional.
Q: How do I create a realistic budget and timeline for the makeover?
A: Start by breaking the project into categories (structural, systems, surfaces, finishes, décor) and assign ballpark costs to each based on local prices and contractor quotes. Build a timeline that places permits and trade work (electrician, plumber, carpenter) at the start, followed by surface work (flooring, cabinets) and finishing touches (paint, trim, décor). Include a contingency of 10-20% and plan for minor delays by blocking extra days in each phase. Get at least two contractor estimates for any trade work and ask for itemized bids so you compare apples to apples. Reserve budget for setback items such as subfloor issues or unexpected wiring updates, and phase lower-priority changes (furnishings, art) into a later season if cash flow or time is tight.
Q: Which tasks should I DIY and which require a professional to achieve a stylish, long-lasting result?
A: Tackle DIY tasks that need patience and careful execution but not technical licensing: painting walls and trim, replacing light fixtures, swapping cabinet hardware, installing peel-and-stick backsplashes, and basic caulking. Hire professionals for work that affects structure or safety: electrical rewiring, major plumbing changes, structural wall removals, complex tile installations that require waterproofing, and HVAC work. Choose pros for custom cabinetry or high-end finish carpentry when finish quality matters. Use a mix-and-match approach: save on labor by doing prep and teardown yourself, then schedule skilled installers for time-sensitive or code-regulated tasks to protect warranties and ensure a polished final look.