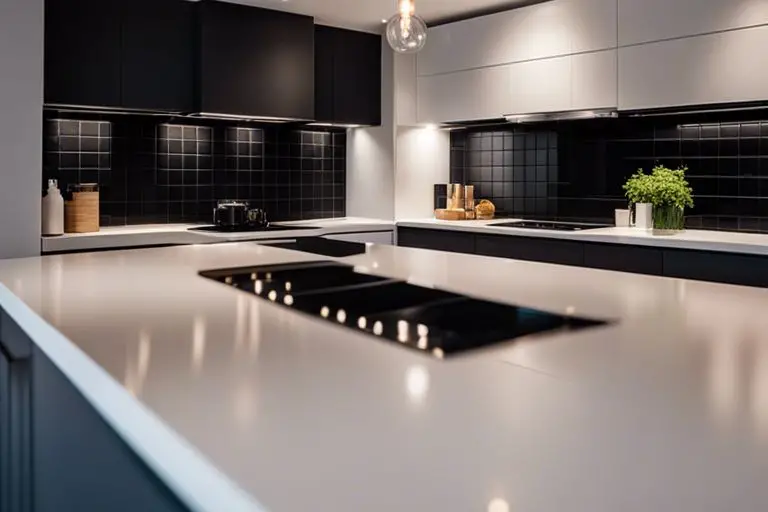
Most homeowners dream of giving their kitchen a fresh new look, but the thought of a messy and costly renovation can be daunting. Fortunately, upgrading your backsplash has never been easier with peel-and-stick backsplash tiles. In this step-by-step guide, we will show you how to effortlessly transform your kitchen by installing a durable and stylish peel-and-stick backsplash, saving you time and money while achieving a professional result.
Key Takeaways:
- Peel-and-stick backsplashes are a cost-effective and easy way to upgrade your kitchen without a major renovation.
- Measure your space accurately before purchasing a peel-and-stick backsplash to ensure you have enough material.
- Clean your kitchen walls thoroughly before applying the peel-and-stick backsplash to ensure proper adhesion.
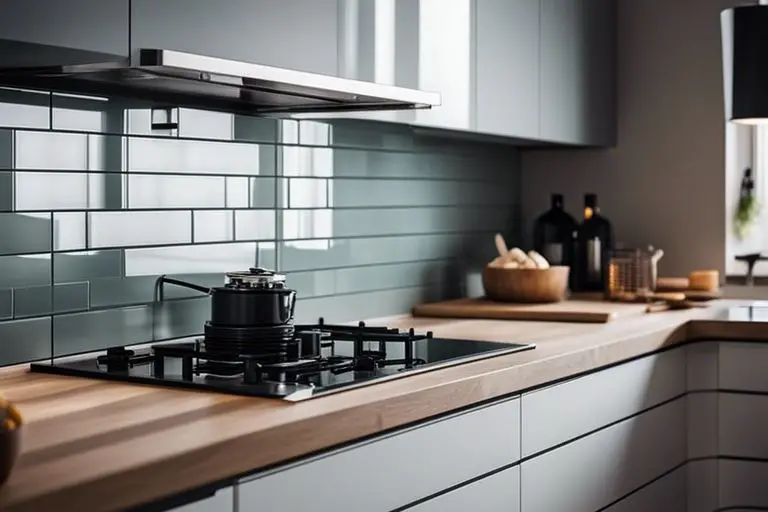
- Start applying the backsplash from the center and work your way outwards to ensure a smooth and uniform installation.
- Use a utility knife to trim the edges of the peel-and-stick backsplash for a perfect fit around outlets and corners.
- Apply pressure to the backsplash after installation to secure it firmly to the wall and prevent peeling or lifting.
- Enjoy your new backsplash and the refreshed look it brings to your kitchen!
Planning and Preparation
Assessing Your Kitchen’s Backsplash Needs
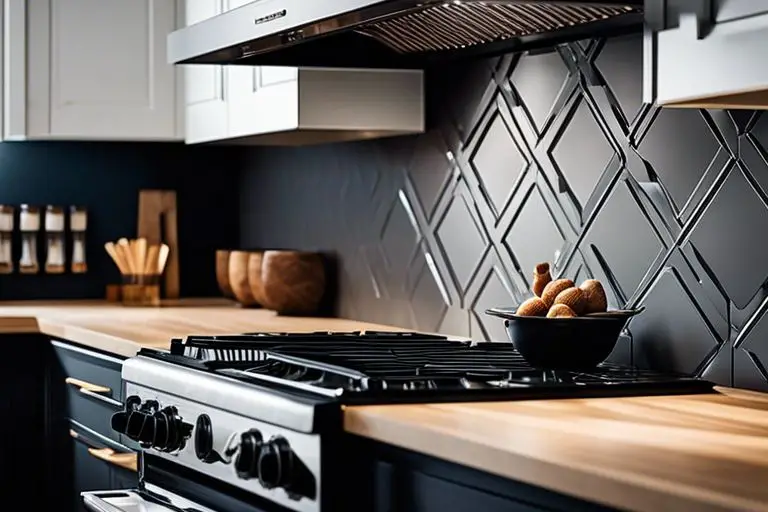
One of the first steps in upgrading your kitchen backsplash is to assess your current needs. Take a look at the condition of your existing backsplash – is it outdated, damaged, or simply in need of a refresh? Determine if you want to completely replace the current backsplash or if installing a new backsplash on top of the existing one is feasible. Consider the style of your kitchen and choose a peel-and-stick backsplash that will complement the overall aesthetic.
Choosing the Right Peel-and-Stick Backsplash Material
NeedsWhen identifying a peel-and-stick backsplash material, consider factors such as durability, ease of cleaning, and style. Peel-and-stick backsplashes are available in a variety of materials such as vinyl, metal, glass, and gel tiles. If you want a backsplash that is easy to maintain and clean, opt for a material that is resistant to stains and water. Additionally, choose a material that reflects your personal style and complements the rest of your kitchen decor.
This
One of the necessary aspects of upgrading your kitchen with a peel-and-stick backsplash is accurate measurement. Measure the area you plan to cover carefully, taking into account any obstacles such as outlets and switches. Proper measurement ensures that you purchase the right amount of material and avoid any unnecessary waste or shortage. Consider ordering slightly more material than you need to account for any mistakes during installation.
Preparing the Surface
Cleaning the Wall
Any successful backsplash installation starts with a clean surface. Make sure to remove any grease, dirt, or grime from the wall where you plan to install the peel-and-stick tiles. The adhesive on the tiles won’t stick properly to a dirty surface, so it’s crucial to clean the wall thoroughly.
Filling in Gaps and Holes
Some walls may have gaps or holes that need to be filled in before installing a backsplash. Use a spackling compound to fill in any imperfections in the wall. Allow the compound to dry completely before proceeding with the installation.
A smooth surface will ensure that the peel-and-stick tiles adhere properly and create a seamless finish. Take your time to fill in any gaps and holes for the best results.
Sanding the Surface
While sanding the wall is not always necessary, it can be beneficial if the surface is uneven or has rough patches. Use a fine-grit sandpaper to smooth out any imperfections on the wall before applying the peel-and-stick backsplash. This step will help the tiles adhere better and result in a more professional-looking finish.
Cleaning up the dust after sanding is crucial to ensure a smooth application of the peel-and-stick tiles. Use a damp cloth to wipe down the wall and remove any dust or debris before proceeding with the installation.
Applying the Peel-and-Stick Backsplash
Starting with a Center Point
Center your peel-and-stick backsplash installation by following the steps outlined in How to Install Peel and Stick Tile Backsplash. This will ensure a balanced and symmetrical look for your kitchen backsplash.
Aligning the Pattern
PeelandStick the pattern of your peel-and-stick backsplash carefully to ensure a seamless look. Matching the design as you go along will create a professional finish that enhances the overall aesthetic of your kitchen.
Understanding the intricacies of aligning the pattern is crucial for achieving a visually stunning backsplash. Take your time and make adjustments as needed to maintain a consistent look.
Applying the Backsplash Sheets
The application process of the peel-and-stick backsplash sheets is straightforward. The key is to carefully align each sheet with the one beside it to create a seamless appearance.
The proper alignment of the sheets is imperative for a polished and cohesive finish. Take care to match up the patterns and edges for a professional result.
Smoothing Out Air Bubbles
Aligning the peel-and-stick backsplash correctly will help prevent air bubbles from forming. If any do appear, simply smooth them out with a squeegee or a clean cloth.
This step is crucial for maintaining the integrity of the backsplash. By eliminating air bubbles, you ensure that the adhesive backing adheres properly for a long-lasting and durable result.
Cutting and Fitting the Backsplash
After reading about how to Install a Peel-and-Stick Backsplash in 6 Steps, it’s time to tackle cutting and fitting the backsplash to ensure a seamless finish in your kitchen.
Measuring and Marking the Cut Lines
Little details like measuring and marking the cut lines are crucial when upgrading your backsplash. Start by measuring the area carefully and then transfer those measurements onto the backsplash sheets. Use a pencil to mark where the cuts need to be made, ensuring that each sheet fits perfectly into place.
Cutting the Backsplash Sheets
Any DIYer can handle cutting the backsplash sheets with the right tools. A utility knife or a pair of sharp scissors can be used to cut through the peel-and-stick material easily. Make sure to follow the cut lines precisely to get clean and accurate cuts for a professional-looking result.
This step requires a steady hand and attention to detail to ensure that the sheets fit exactly where they need to go. Take your time and double-check your measurements before making any cuts to avoid errors.
Fitting the Backsplash Around Outlets and Switches
This final step involves fitting the backsplash around outlets and switches for a polished look. Cut the sheets to fit around these obstacles, ensuring a snug and seamless finish. Use a sharp utility knife to make precise cuts around the outlets and switches, taking care not to leave any gaps between the backsplash and the fixtures.
Some DIYers may find it helpful to make a paper template of the outlet or switch before cutting the backsplash sheet. This can help ensure a perfect fit and reduce the chances of errors during installation.
Understanding the importance of precise measurements, clean cuts, and careful fitting is key to successfully upgrading your kitchen backsplash. By following these steps and taking your time with each cut and fit, you can achieve a professional-looking result that enhances the overall look of your kitchen.

Troubleshooting Common Issues
Once again, if you encounter any issues during the installation of a peel-and-stick backsplash, it’s vital to know how to troubleshoot them. For a detailed guide on installing peel-and-stick backsplash tiles, check out this DIY Peel and Stick Backsplash Tile tutorial.
Dealing with Air Bubbles and Wrinkles
Troubleshooting: If air bubbles or wrinkles appear under the peel-and-stick backsplash tiles, use a smoother or squeegee to carefully press them out towards the edges. Work from the center outwards to remove any trapped air. If wrinkles persist, gently lift the tile and reapply it, making sure to smooth it out as you go.
Fixing Misaligned Patterns
Some peel-and-stick backsplash tiles come with patterns that need to be matched when installed. If you find that the patterns are misaligned, carefully remove the misaligned tiles, adjust them accordingly, and reapply them in the correct position. Take your time to ensure a seamless pattern across the backsplash.
Handling Edge and Corner Issues
Bubbles: If you notice bubbles forming at the edges or corners of the peel-and-stick backsplash, use a sharp utility knife to carefully trim the excess material. Ensure a snug fit along edges and corners to prevent peeling over time. You can also apply a small amount of heat from a hairdryer to help the adhesive bond better in these areas.
Tips and Factors to Consider
All factors should be considered before beginning a backsplash upgrade project. Here are some tips to help you along the way:
- Measure accurately before purchasing materials.
- Clean and prepare the wall surface properly.
- Use a level to ensure straight and even placement.
- Start from the center and work your way out for a symmetrical look.
- Consider the lighting in your kitchen when choosing colors and finishes.
After installing your new backsplash, remember to step back and admire your handiwork. It’s amazing how such a simple upgrade can completely transform the look of your kitchen!
Working with Patterned Backsplashes
Backsplashes with patterns can be a bit trickier to work with than solid colors. When installing a patterned backsplash, take extra care to align the patterns correctly for a seamless and professional finish. It may also be helpful to cut the tiles along the pattern lines to ensure a cohesive look.
Using a Credit Card to Smooth Out Bubbles
Even with the best installation techniques, bubbles can sometimes form under the peel-and-stick tiles. Use a credit card to gently smooth out any bubbles during the application process. This will ensure a smooth and flat finish for your backsplash.
The use of a credit card is a simple yet effective trick to achieve a professional-looking installation. By pressing out air bubbles, you can ensure that your peel-and-stick backsplash stays securely adhered to the wall.
Avoiding Common Mistakes
Now, to achieve the best results with your peel-and-stick backsplash, it’s crucial to avoid common mistakes. One of the most common errors is not properly cleaning the wall before installation. Any grease or dirt on the surface can prevent the tiles from sticking correctly. Additionally, rushing the installation process can lead to crooked or uneven placement of the tiles.
Considering Additional Design Elements
Plus, when upgrading your backsplash, don’t forget to consider additional design elements that can enhance the overall look of your kitchen. Mixing different finishes, textures, or shapes of tiles can add depth and visual interest to the space. You can also incorporate decorative accents or borders for a more personalized touch.
Bubbles, contrast, and accent pieces can all contribute to creating a visually appealing and cohesive design. By carefully considering these additional elements, you can elevate the style of your kitchen and make a lasting impression on anyone who enters the space.
Conclusion
As a reminder, upgrading your kitchen backsplash can be a simple and cost-effective way to give your space a fresh new look. By choosing a peel-and-stick backsplash, you can easily install it yourself without the need for any special tools or skills. This can be a great weekend project that can completely transform the look of your kitchen.
Whether you are looking to add a pop of color, texture, or pattern to your kitchen, a peel-and-stick backsplash offers a wide range of options to suit your style. With a little bit of time and effort, you can achieve a professional-looking result that will enhance the overall appearance of your kitchen. So why not give it a try and upgrade your backsplash today?
FAQ
Q: What materials do I need to upgrade a backsplash with peel-and-stick tiles?
A: To install a peel-and-stick backsplash in your kitchen, you will need the following materials: peel-and-stick backsplash tiles, utility knife, ruler, level, pencil, cutting mat, and a clean, dry surface.
Q: How do I prepare the surface before installing a peel-and-stick backsplash?
A: Before installing a peel-and-stick backsplash, make sure to clean the surface thoroughly to remove any dirt, grease, or debris. Use a degreaser if necessary and ensure the surface is dry before proceeding.
Q: How do I measure and cut peel-and-stick tiles for a precise fit?
A: Use a ruler and pencil to measure the area where you will be installing the backsplash. Mark the measurements on the peel-and-stick tiles and use a utility knife to cut them to the desired size. A cutting mat can help protect your work surface.
Q: What is the best way to start installing peel-and-stick tiles on the wall?
A: Start by finding the center of the wall and use a level to draw a vertical line as a guide. Begin applying the peel-and-stick tiles along this line, working outward in both directions to ensure a symmetrical layout.
Q: How can I ensure that the peel-and-stick tiles are applied evenly and without air bubbles?
A: Carefully press each tile onto the wall, starting from the center and working your way outwards. Use a flat edge, like a ruler, to smooth out the tiles and remove any air bubbles as you go.
Q: Can I install a peel-and-stick backsplash over existing tiles?
A: Yes, peel-and-stick backsplash tiles can be installed over existing tiles as long as the surface is clean, smooth, and free of any loose tiles or grout. It’s a quick and easy way to update your backsplash without the need for a messy removal process.
Q: How do I maintain and clean a peel-and-stick backsplash after installation?
A: To clean a peel-and-stick backsplash, simply use a mild cleaner and a soft cloth to wipe away any dirt or grime. Avoid using abrasive cleaners or tools that could damage the surface of the tiles.